Skip to content
SA Silver and Indigo

Silver and Indigo

  • about
  • jewelry
  • sewing
  • photography
    • photojournal
  • instagram
  • music
  • Toggle search form

R&D100 Awards

Posted on December 10, 2019December 10, 2019 By johannabobrow No Comments on R&D100 Awards

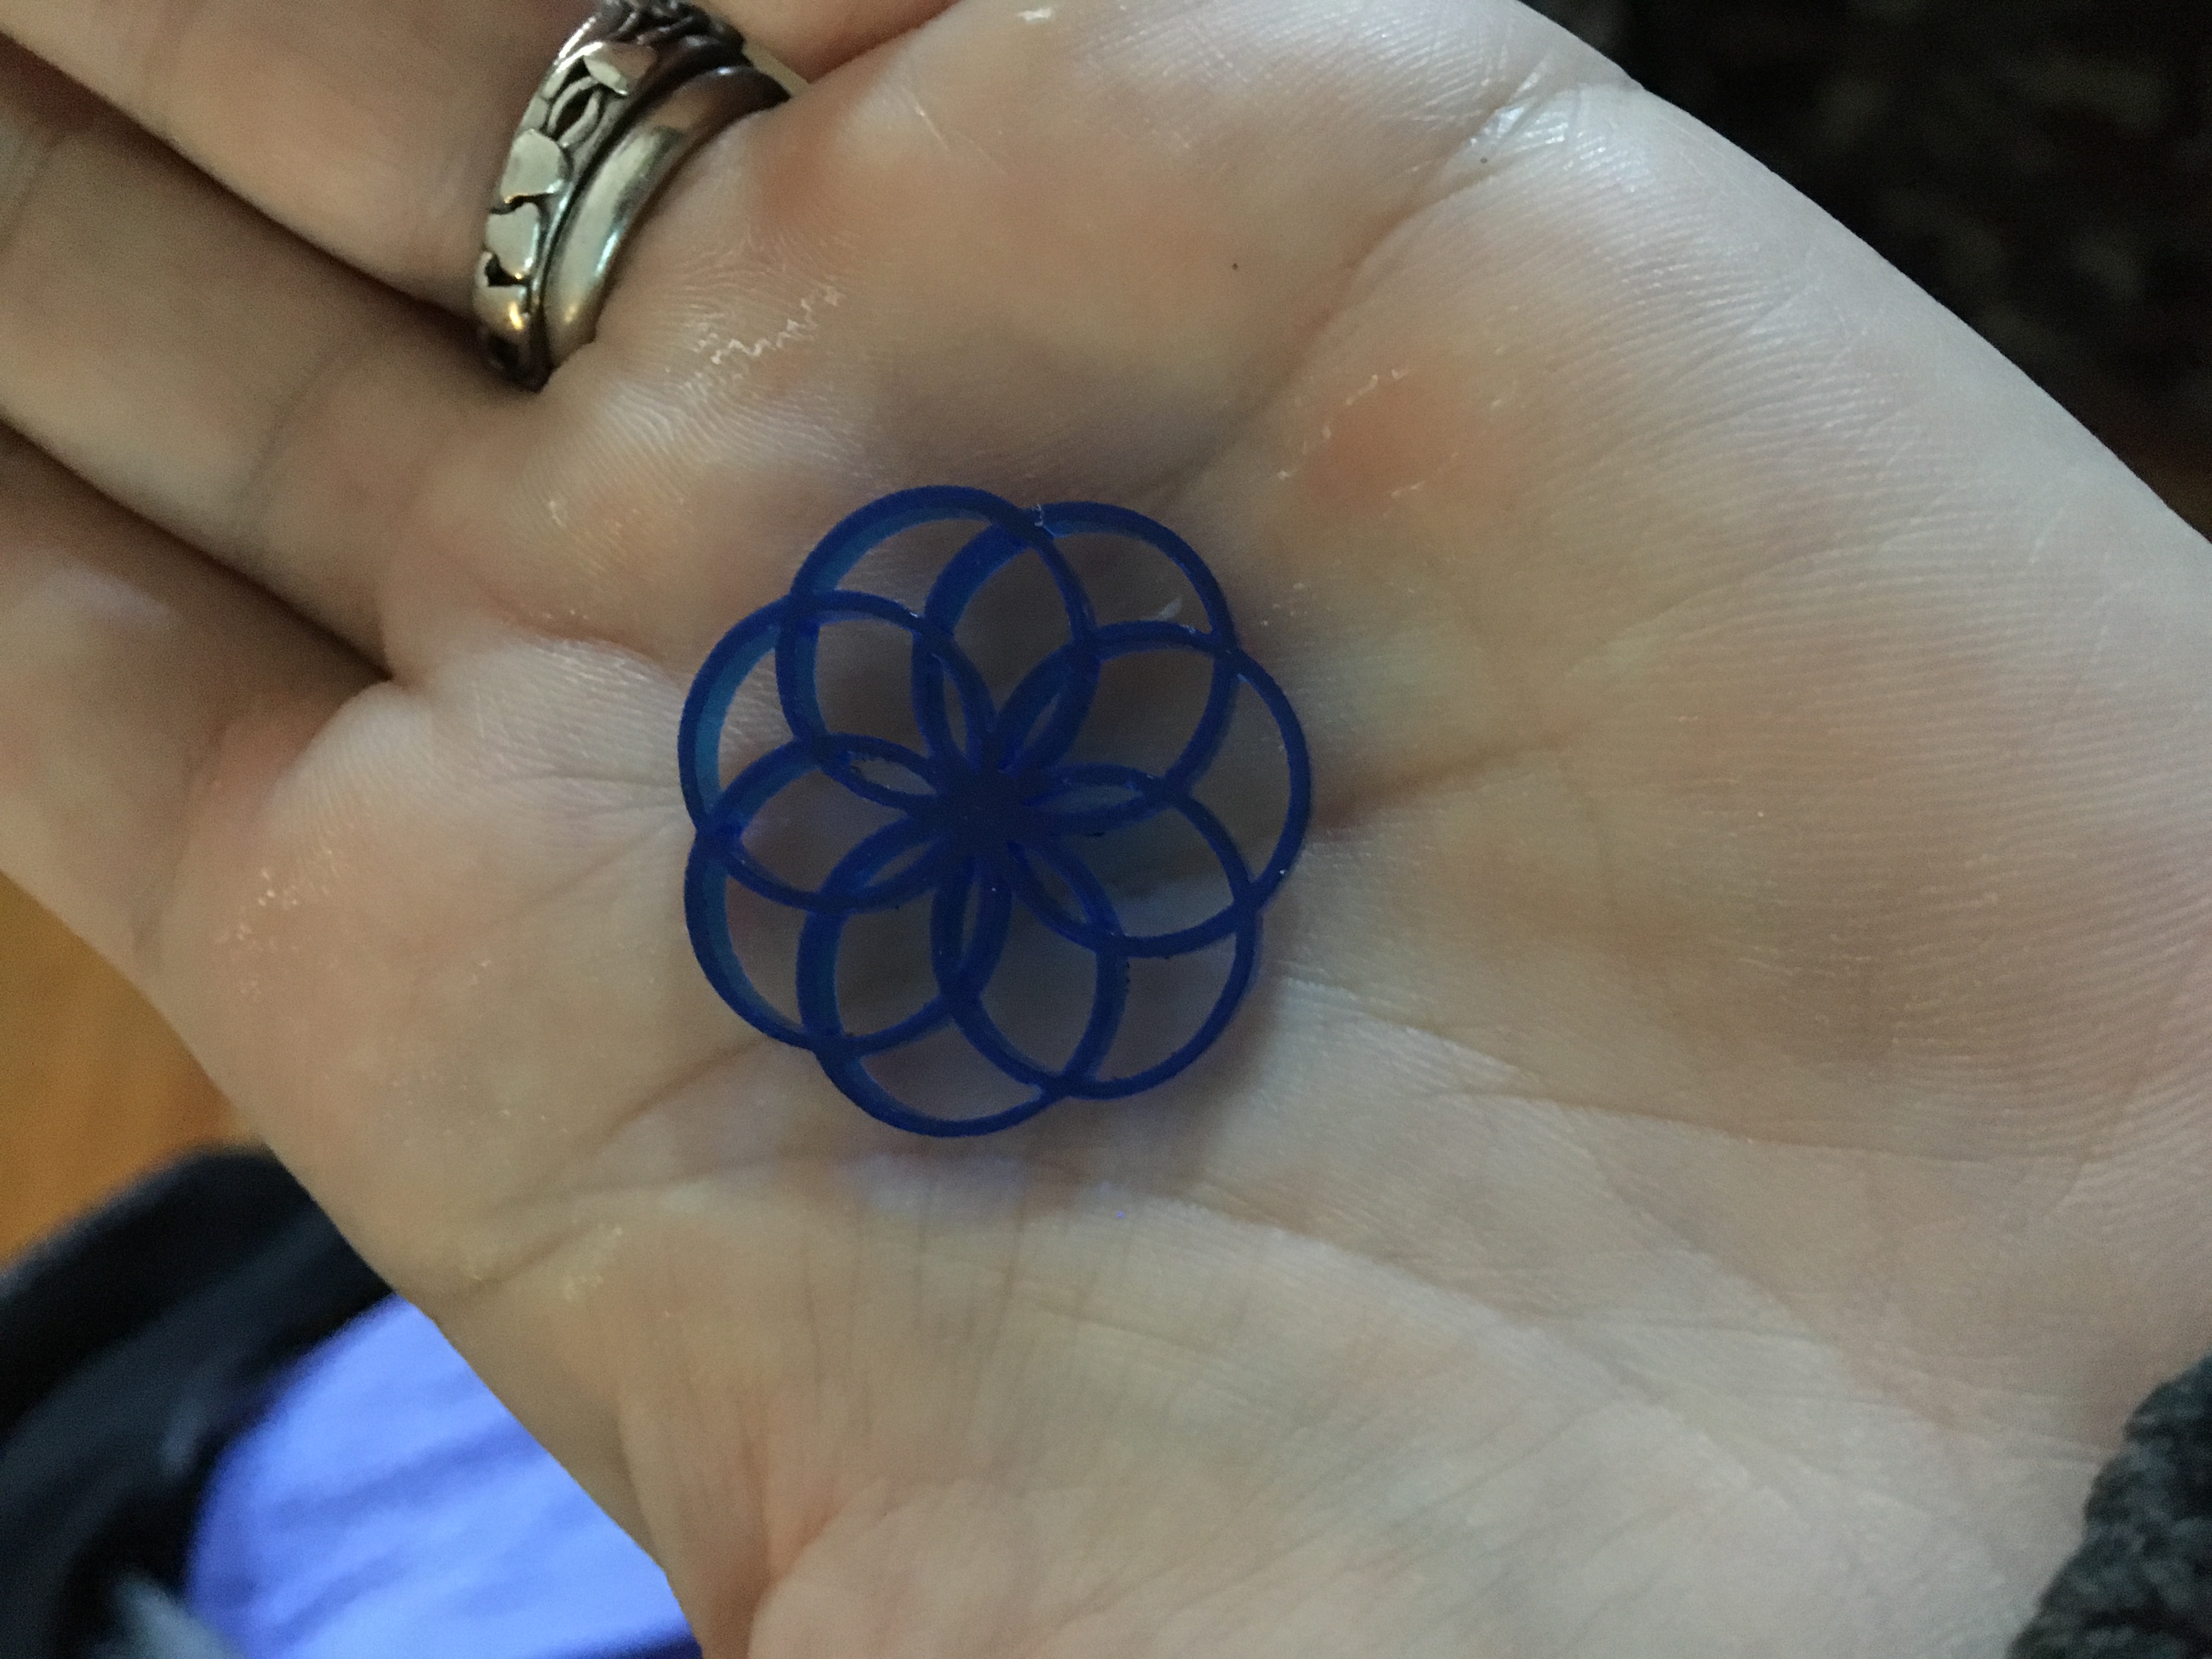
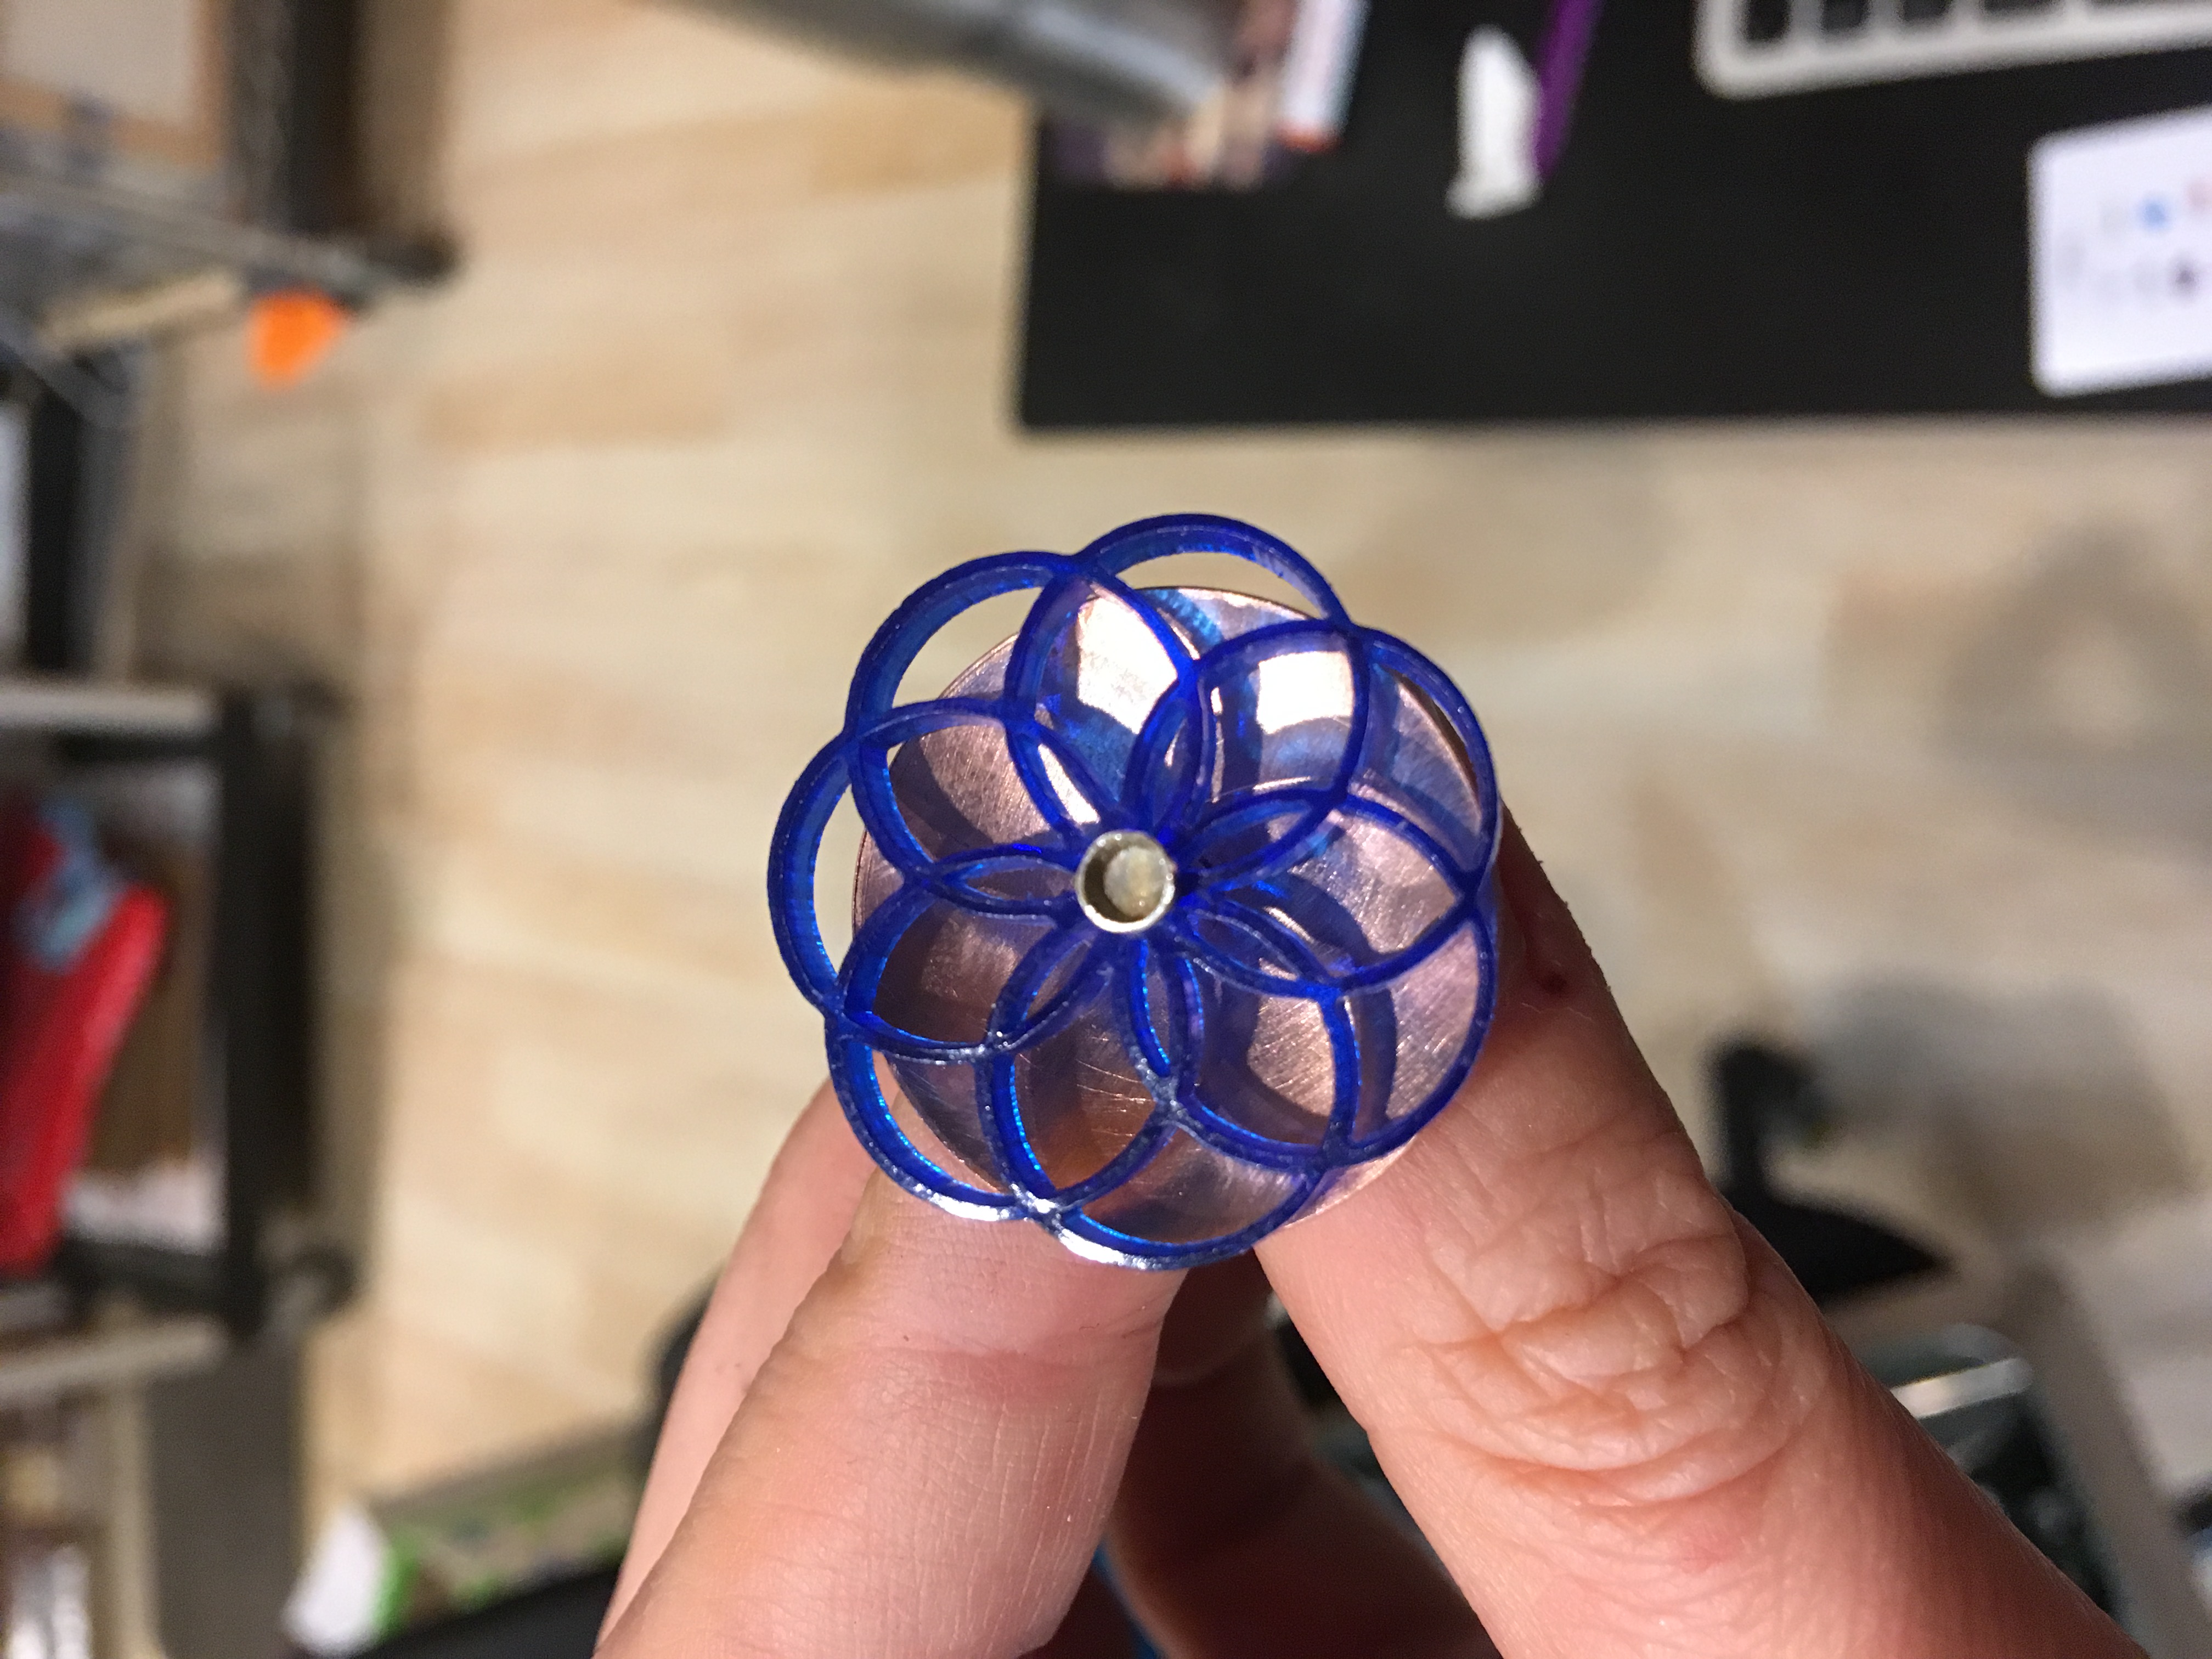
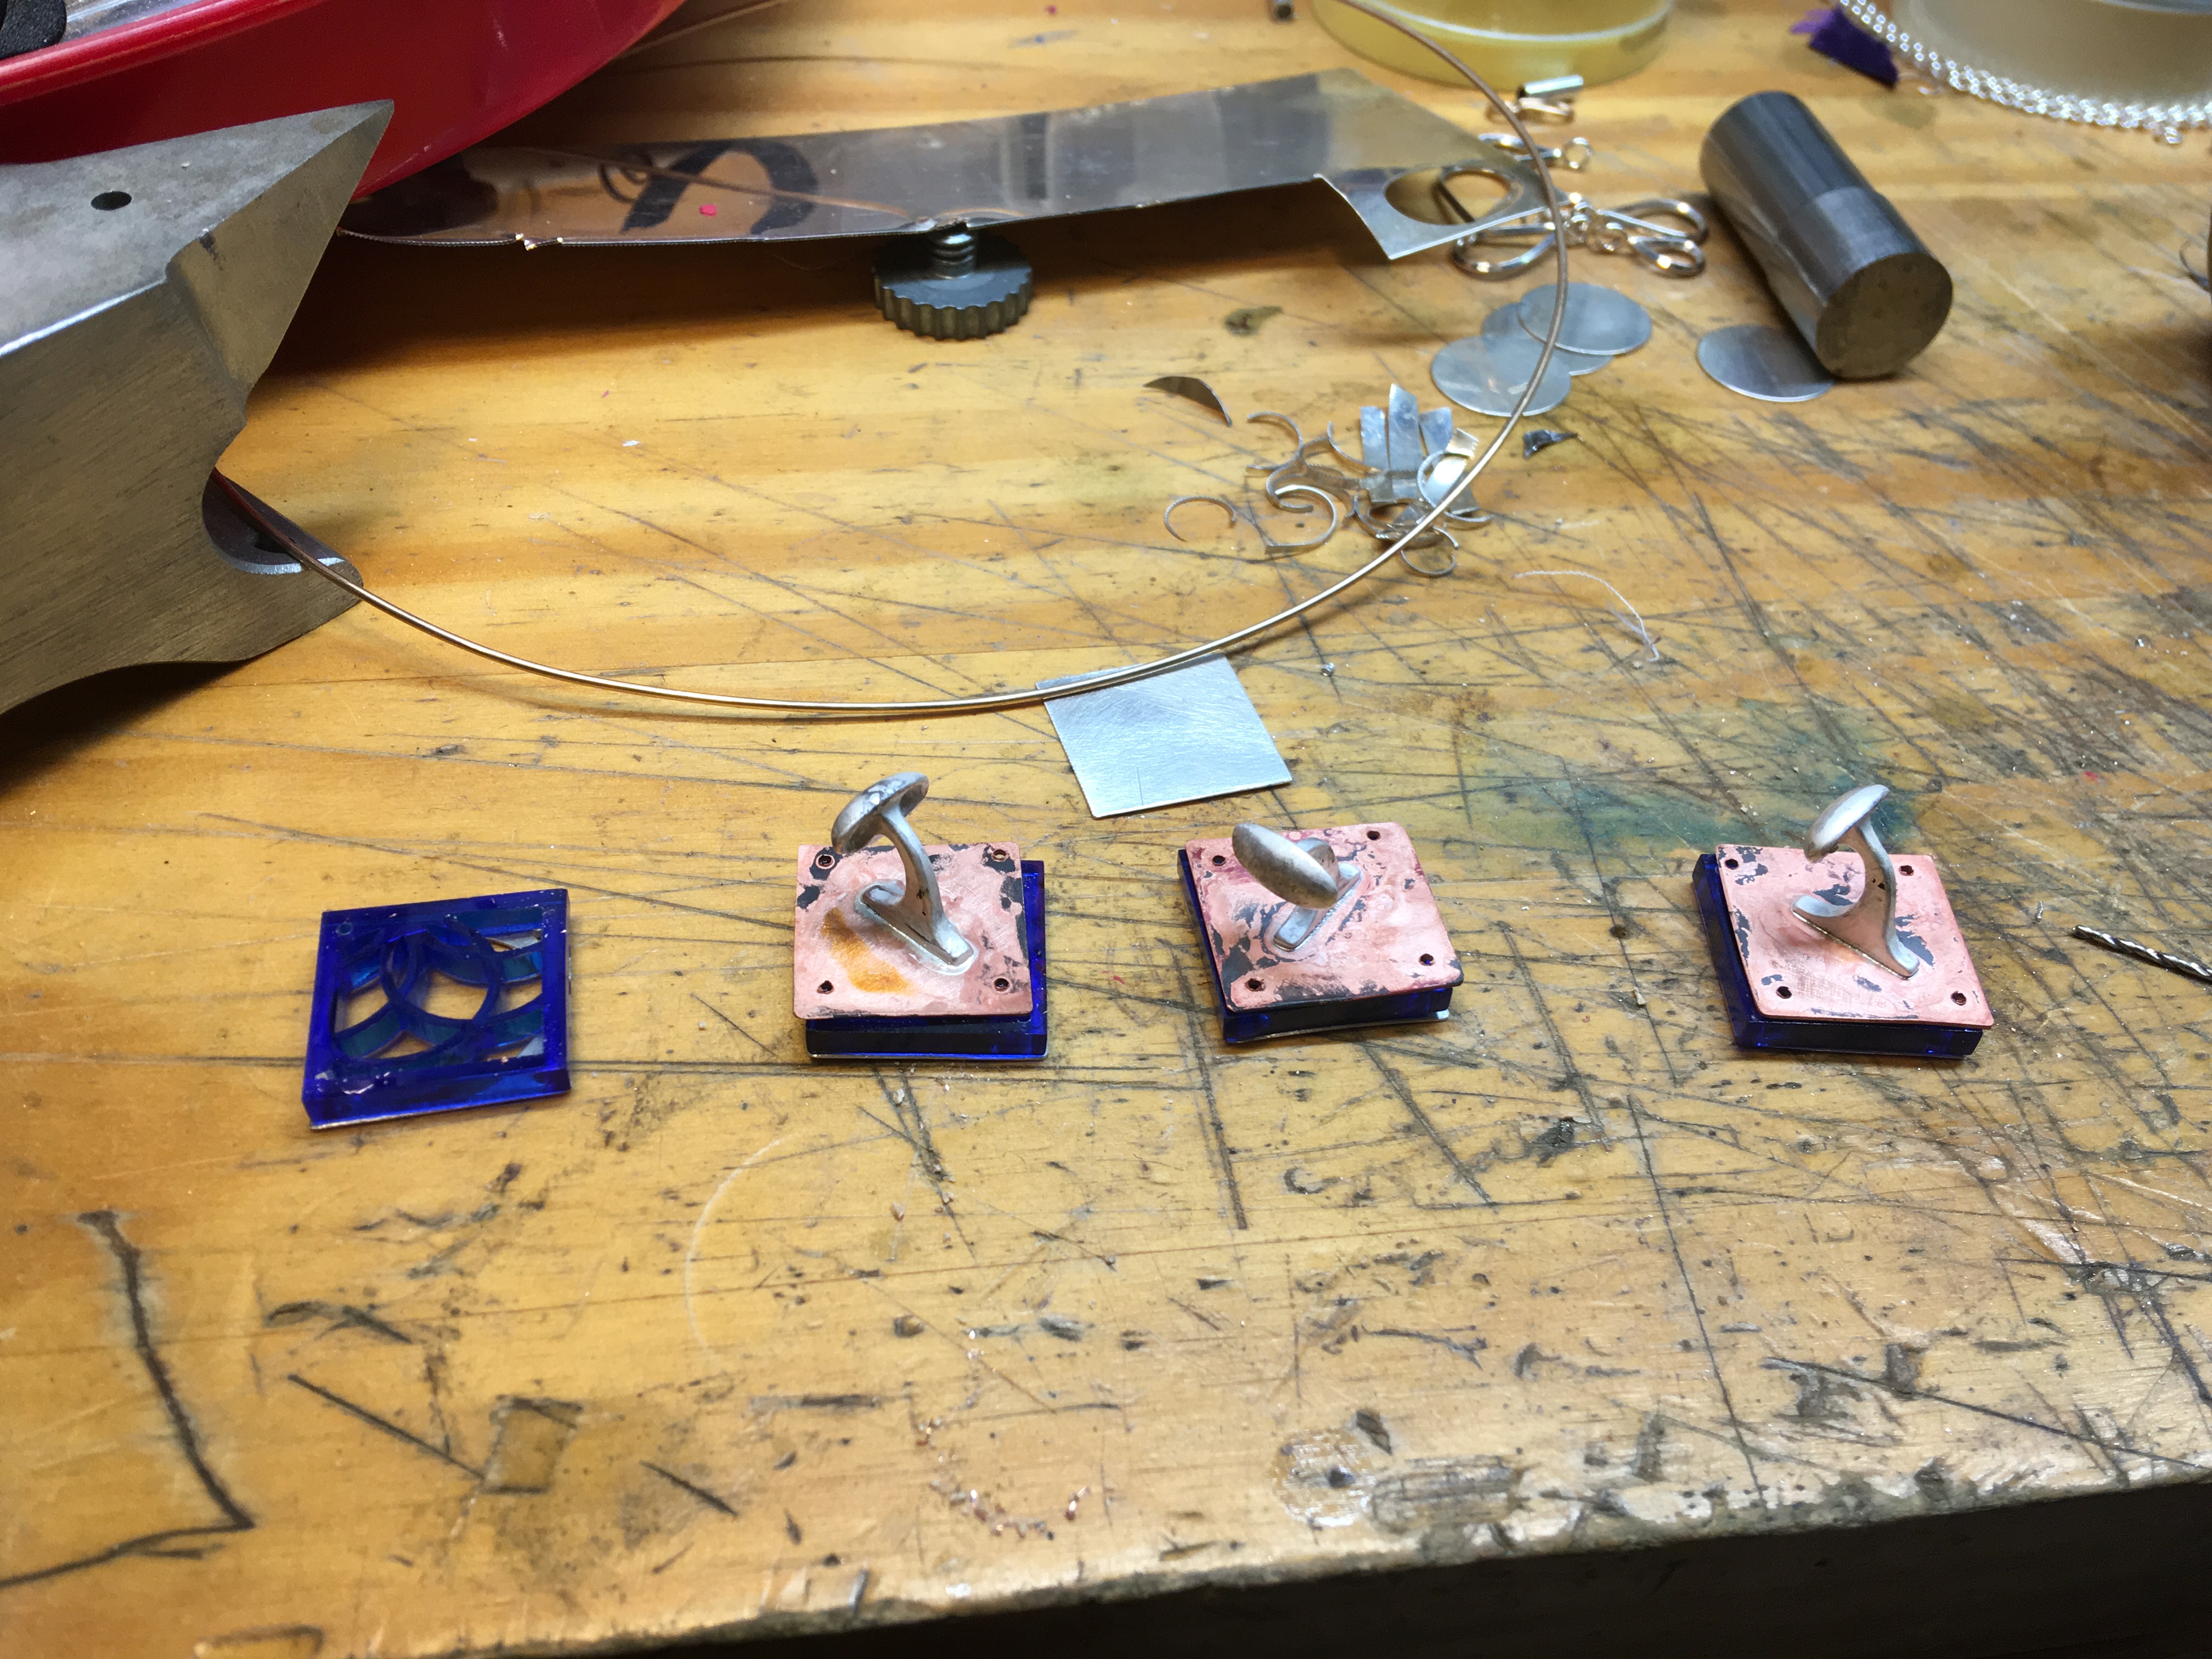
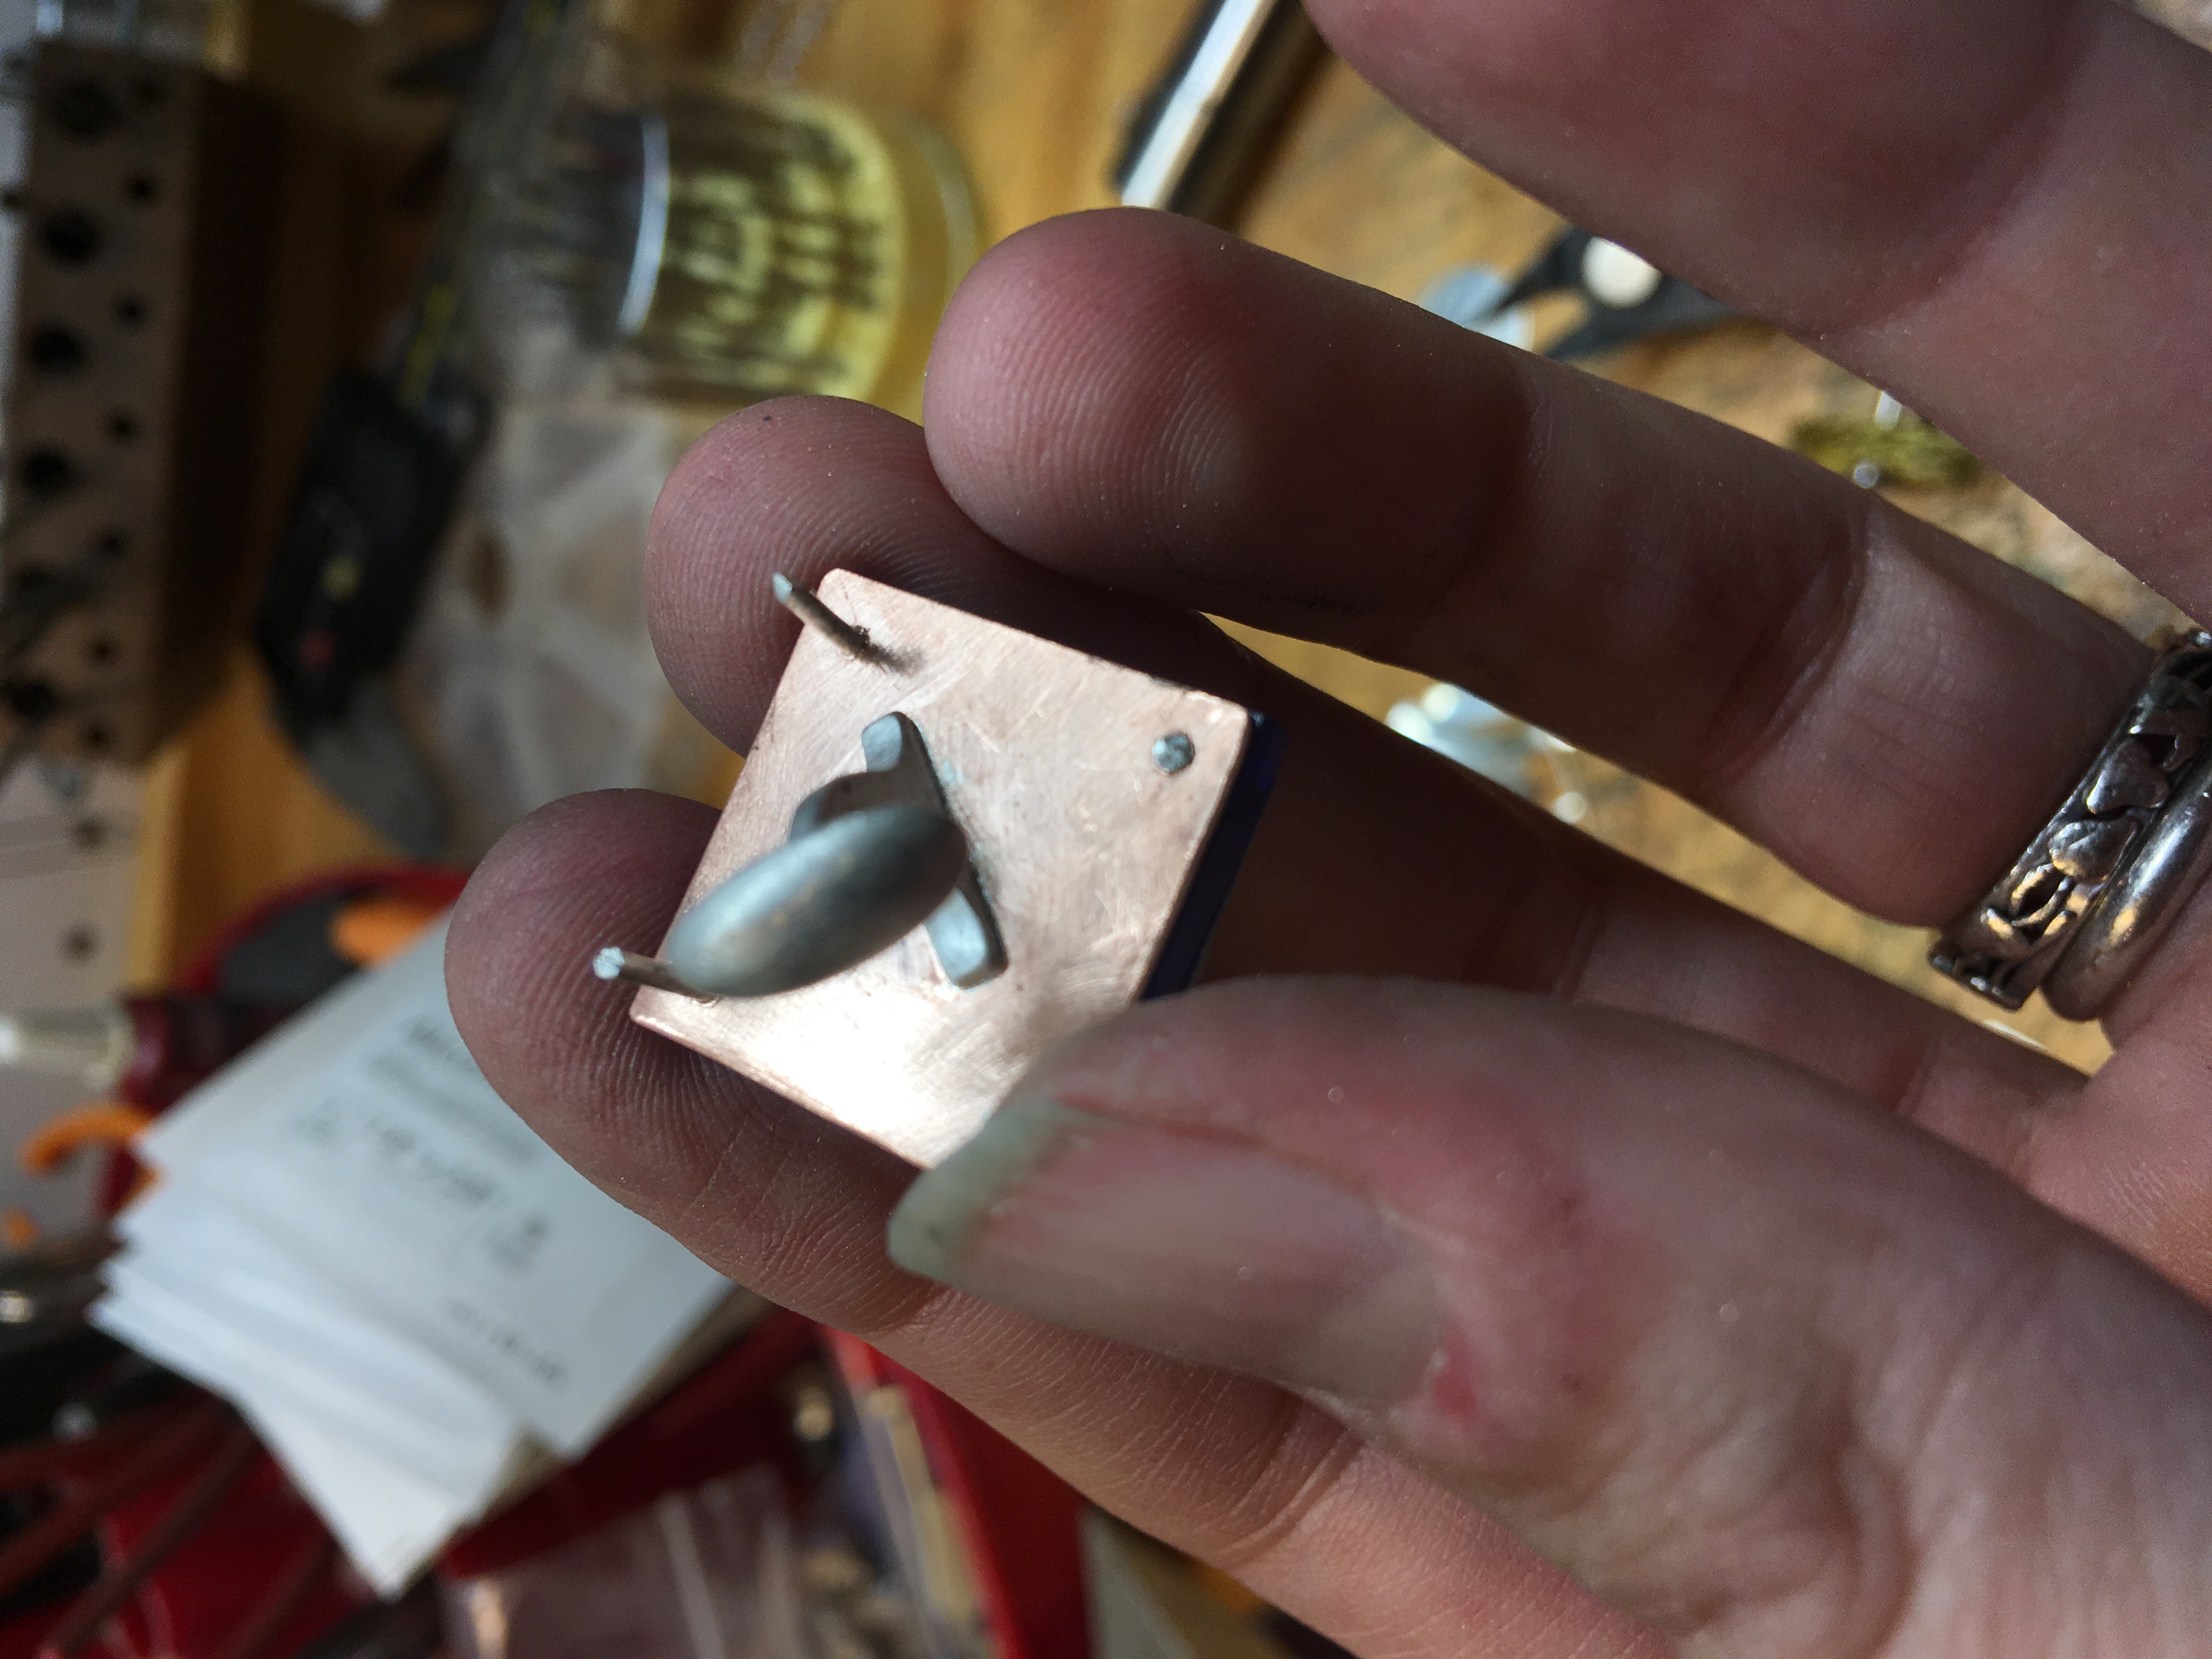
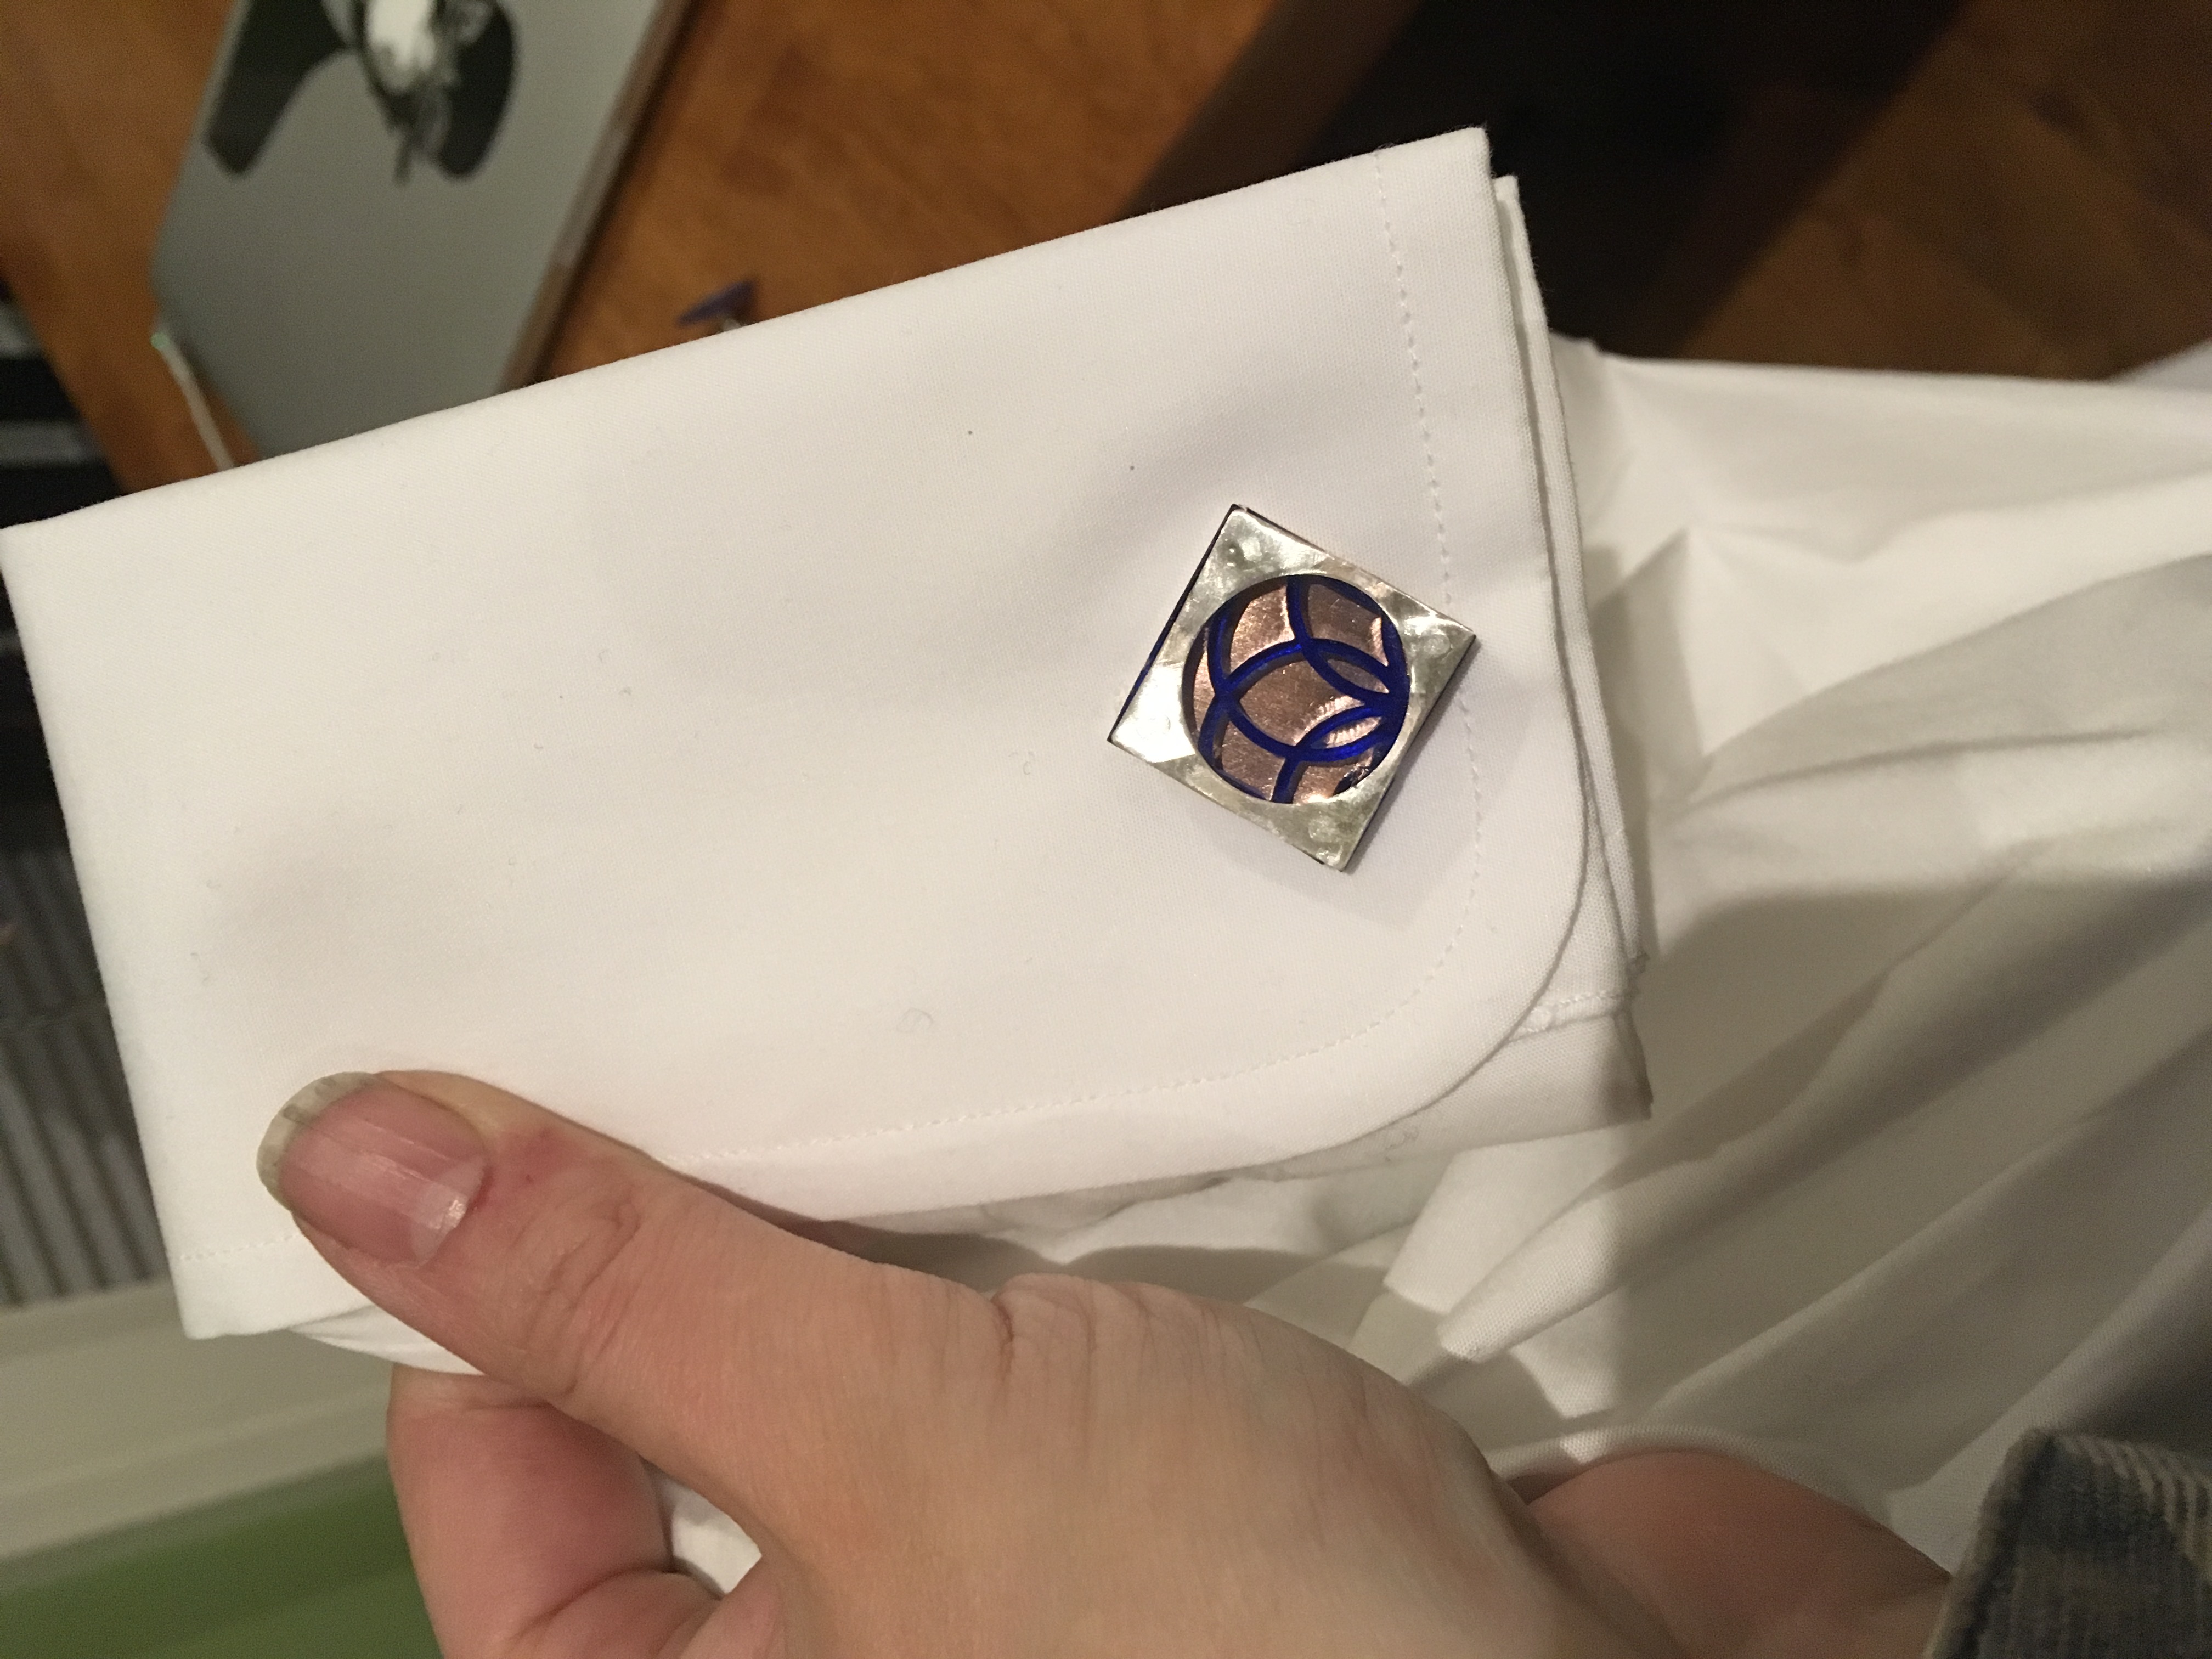
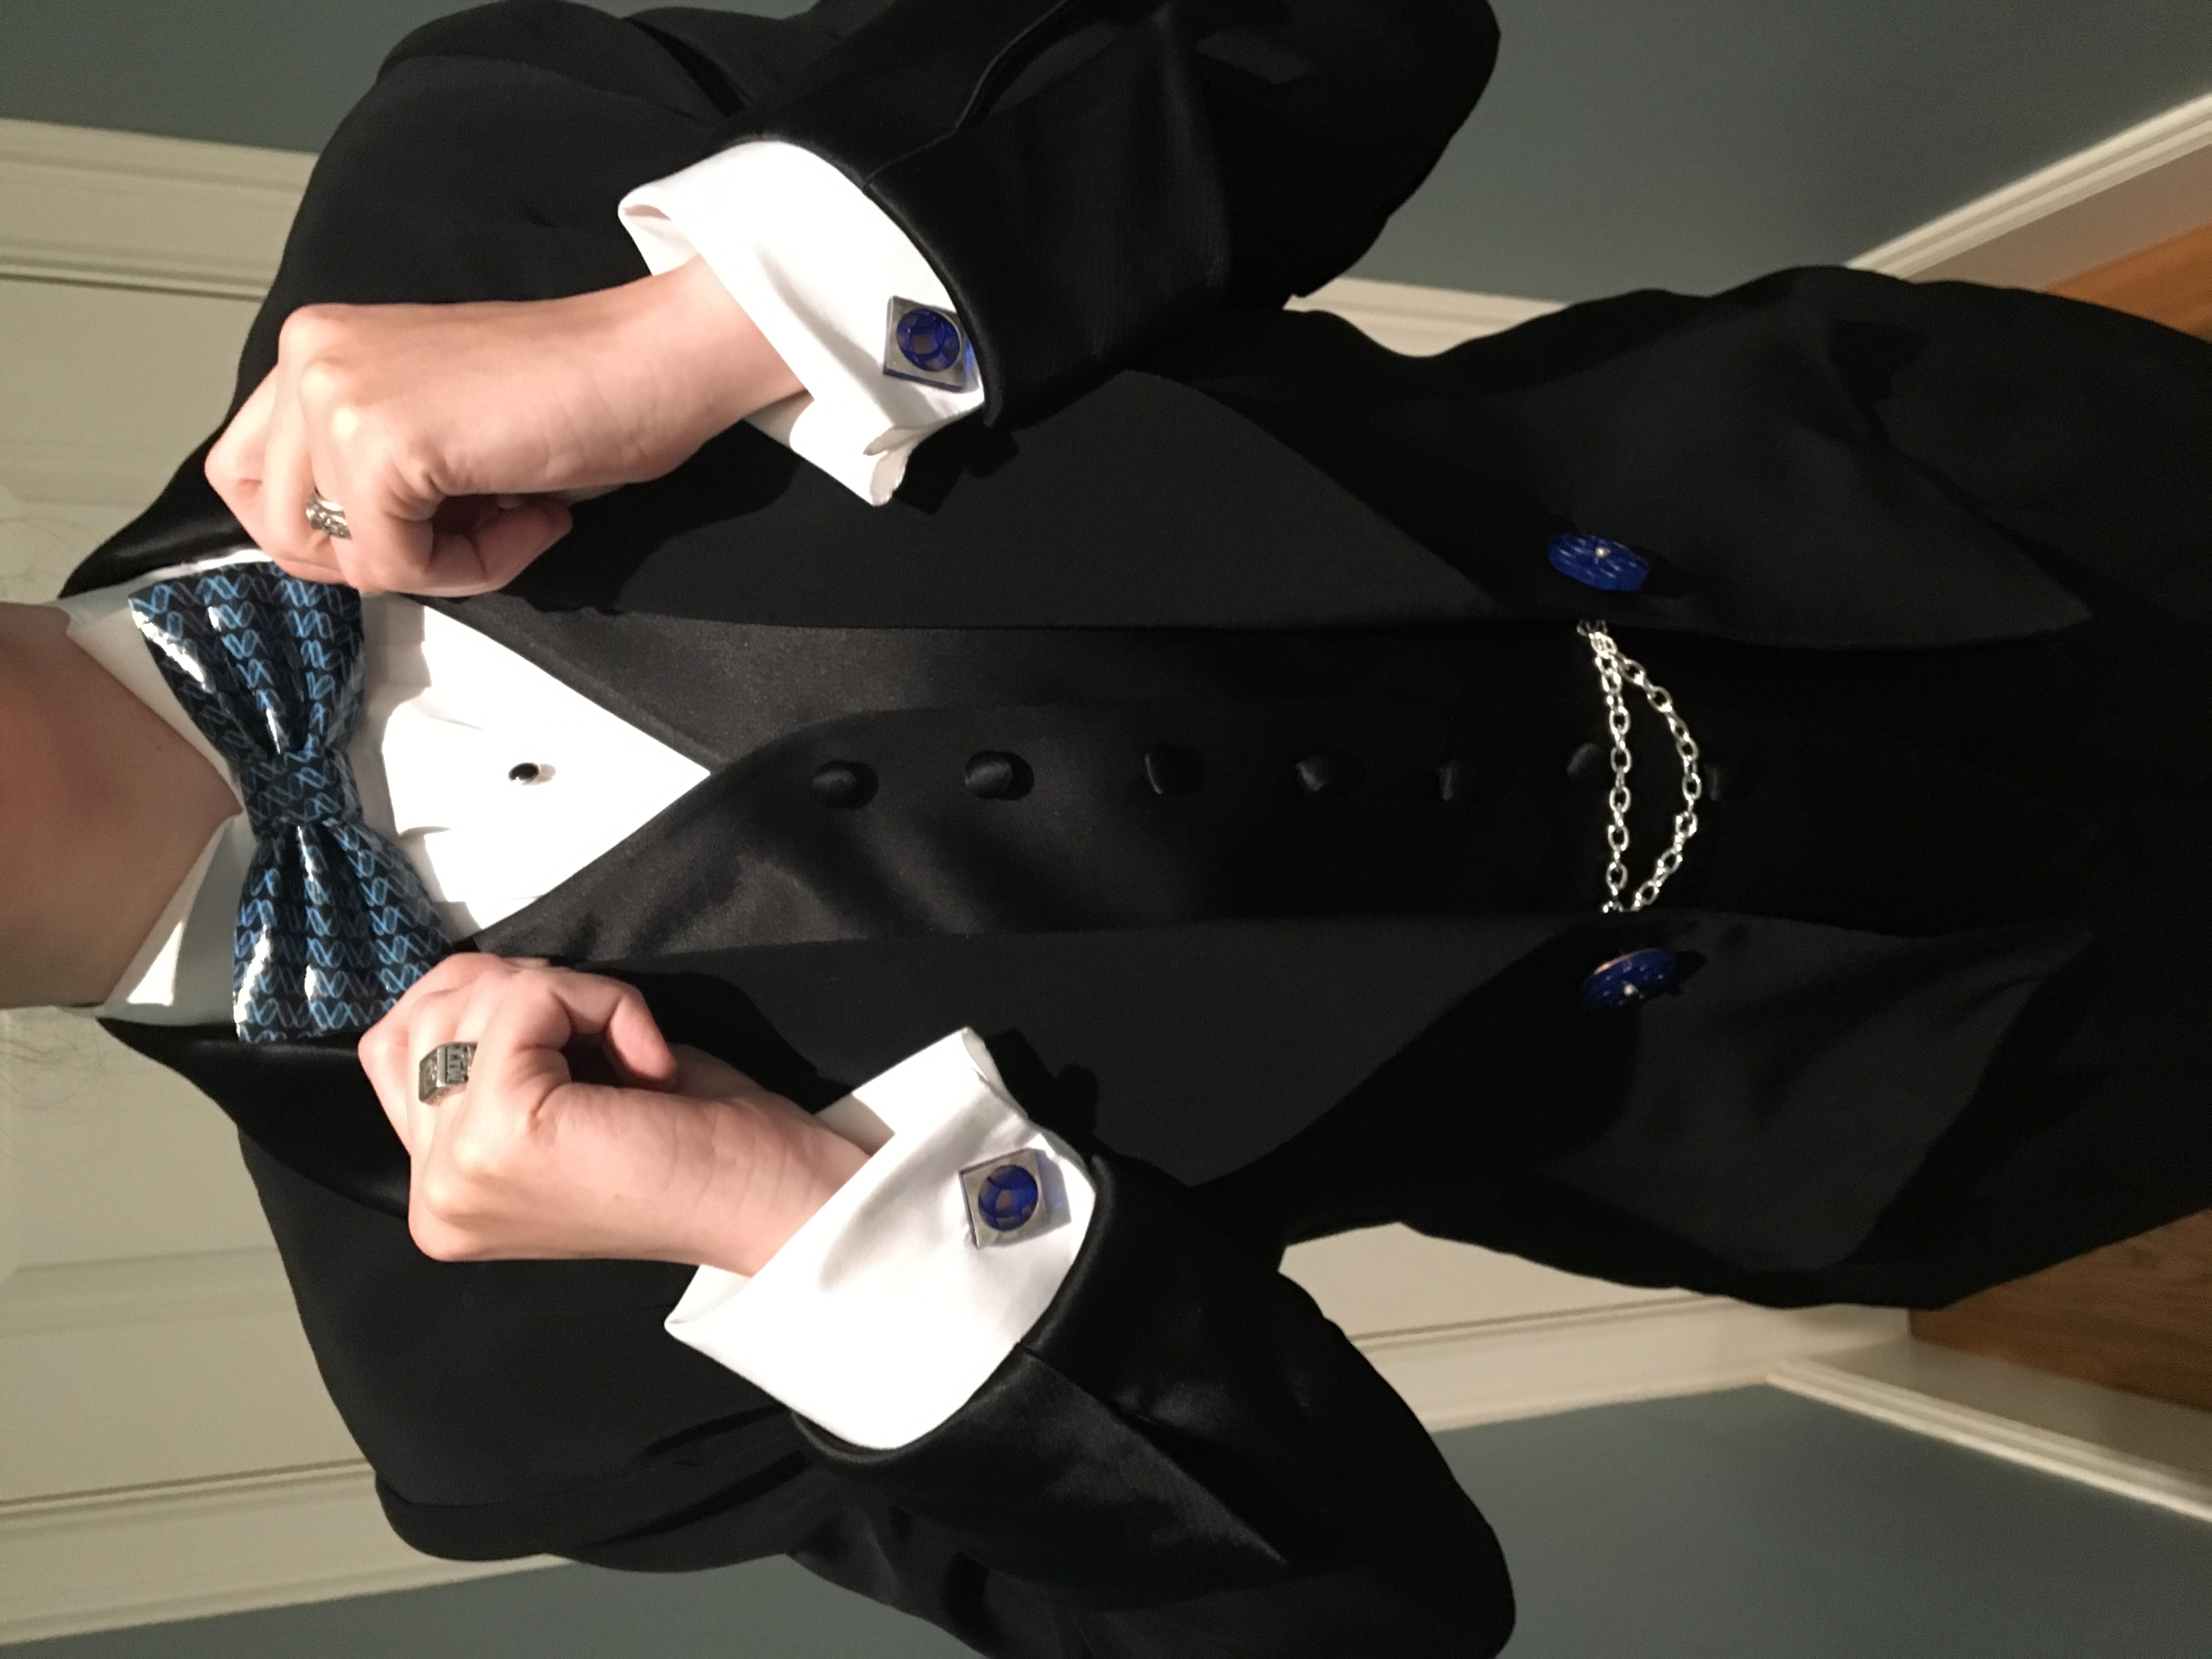
When a project I work on (that involves 3D printing) won one of this years R&D100 awards, my boss said “…we should wear matching 3D printed bow ties to the award ceremony”. Naturally this lead to not only 3D printed bowties, but using the laser-cutter to make components for cufflinks and the button-closure on my tuxedo.

Initial idea: 7-circle symmetry, drawn in CAD, cut into .1″ transparent blue acrylic.
I love how the light shines through the acrylic onto the copper to echo the geometry. (Cut a copper disk, dapped it, drilled a hole and made a little rivet with a bezel setting on top.)
Wire from the rivet goes through, and the back has a button shank soldered on.
Ended up making a cute spiral instead of actually riveting the back due to space and fragility constraints.
…and then set 3mm opals in the front!
…these are the parts for the cufflinks. The acrylic is just a bit from the same pattern as the button, with a square border. Copper backs for the same color scheme as the buttons, silver fronts cut out with a disk cutter.
Stacked up to check how it lines up…
Taped the whole stack together, drilled holes in the corners (if I were clever I would have done it with a jig, in a drill press, but this was quick and dirty and just done with the handheld flex-shaft.) Checking that the 18g (~1mm) wire fit neatly…
Solder the (pre-made) sterling cufflink findings onto the copper, keeping careful track of which set go together because they drill holes are all SLIGHTLY differently placed… (next time, use a jig.)
Insert wires through the silver holes, solder in place, and then polish down the front til you can’t see the rivets anymore, and carefully insert all four through the layers of acrylic and copper…
Then clip it close and hit it with the riveting hammer!
…and DONE!
I like how the angle turned out on the shirt.
Sadly I have no process photos from the tie because it was done at work where we can’t take pictures. But I chose a DNA image (that actually had the right number of bases per turn and major/minor grooves because I have standards for my representational images) and used photoshop to “wrap” the STL (remixed from here: https://grabcad.com/library/bowtie-6 — I made mine a little narrower) and printed it on the Stratasys J750. It turned out pretty well and goes nicely with the rest of the outfit.
And here we are with our award, our fancy bowties, and our cufflinks 🙂
Uncategorized Tags:silverwork

Post navigation

Previous Post: The Spousening
Next Post: Simple Mask Pattern

Related Posts

Birthday LARP Uncategorized
Star Island, 2014 Uncategorized
Simple Mask Pattern Uncategorized

Leave a Reply

You must be logged in to post a comment.

Copyright © 2024 Silver & Indigo.

Powered by PressBook Masonry Dark